how to laser engrave
Introduction
Laser engraving has revolutionized the way we personalize and customize a wide range of materials. From industrial applications to hobbyist projects, understanding how to laser engrave opens up a world of creative and professional possibilities. This comprehensive guide delves into the intricate details of laser engraving, providing you with the knowledge and tools needed to master this technology. We will explore the principles of laser engrave cutting, the equipment involved, techniques for various materials, safety considerations, and advanced tips to enhance your engraving projects.
Fundamentals of Laser Engraving
At its core, laser engraving is a subtractive manufacturing process that uses a focused beam of light to remove material from a surface, thereby creating a design, text, or image. The precision and speed of laser engravers have made them indispensable in industries ranging from jewelry making to aerospace engineering.
How Laser Engraving Works
Laser engraving machines direct a concentrated beam of light onto a material. This beam heats the material to the point of vaporization, creating a cavity that forms the desired image or text. The depth and intensity of the engraving are controlled by adjusting the laser’s power and speed settings.
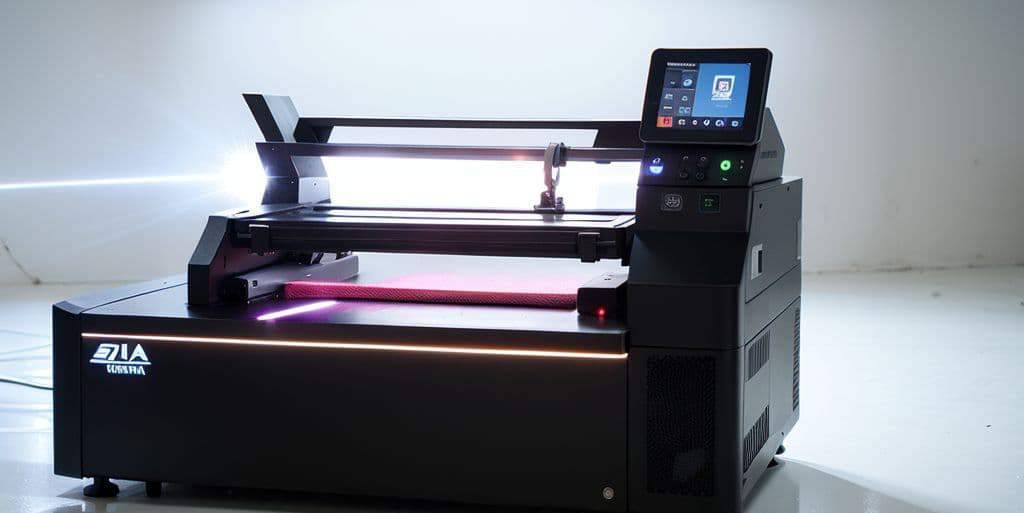
Types of Laser Engraving Machines
There are several types of laser engraving machines, each suited for specific materials and applications:
- CO2 Lasers: Ideal for non-metal materials like wood, acrylic, glass, and leather.
- Fiber Lasers: Best for metals and plastics, offering high-speed engraving.
- Diode Lasers: Commonly used in DIY projects; suitable for softer materials.
Understanding the differences between these machines is crucial when determining laser engrave cutting needs for specific projects.
Choosing the Right Materials
The choice of material significantly impacts the engraving process and outcome. Materials react differently to laser engraving based on their physical properties.
Common Materials for Laser Engraving
Here are some widely used materials:
- Wood: Offers excellent contrast and is ideal for signage and artwork.
- Glass: Engraving creates a frosted appearance, perfect for decorative items.
- Metals: Requires higher-powered lasers; used for tools, jewelry, and industrial parts.
- Acrylic: Provides clean cuts and is great for signage and displays.
- Leather: Engraving adds a rustic or sophisticated touch to accessories.
Selecting the appropriate material is essential for achieving the desired effect in your laser engrave cutting projects.
Safety Precautions
Operating a laser engraver requires adherence to safety protocols to prevent accidents and equipment damage.
Personal Protective Equipment (PPE)
Always wear appropriate PPE:
- Safety Glasses: Protects eyes from laser light and debris.
- Gloves: Shields hands from sharp edges and hot materials.
- Respirators: Prevents inhalation of fumes and dust from certain materials.
Equipment Maintenance
Regular maintenance ensures longevity and optimal performance:
- Cleaning Lenses: Keeps the laser beam efficient.
- Checking Ventilation: Ensures removal of hazardous fumes.
- Software Updates: Provides new features and security patches.
For detailed maintenance guidelines, refer to our resource on laser engrave cutting equipment care.
Step-by-Step Guide to Laser Engraving
Embarking on a laser engraving project involves several critical steps to ensure success.
Design Preparation
Begin with a clear design using vector graphics software like Adobe Illustrator or CorelDRAW. Vector images are scalable without loss of quality, making them ideal for precise engraving.
Ensure your design considers the material’s characteristics and the laser’s capabilities. For example, intricate designs may not translate well on coarse materials.
Machine Setup
Proper machine setup is crucial:
- Focus the Laser: Adjust the focal distance for maximum precision.
- Secure the Material: Prevents movement that could blur the engraving.
- Adjust Settings: Set the appropriate power, speed, and frequency.
Consult your machine’s manual or visit our guide on laser engrave cutting machine operation for detailed instructions.
Running a Test Engraving
Always perform a test run on a scrap piece of the same material. This step helps fine-tune settings and prevents costly mistakes on your final workpiece.
Executing the Engraving
Once satisfied with the test, proceed with the actual engraving:
- Start the Machine: Monitor the process to catch any issues early.
- Quality Check: Inspect the engraving for consistency and depth.
- Post-Processing: Clean the material to remove residue or debris.
Advanced Techniques
For those looking to enhance their laser engraving skills, exploring advanced techniques can significantly improve the quality and complexity of your projects.
3D Laser Engraving
3D engraving adds depth by varying the laser’s power to create shadows and contours. This technique is ideal for artistic pieces and detailed maps.
Learn more about designing for 3D laser engraving in our comprehensive article on laser engrave cutting methodologies.
Photographic Engraving
Transforming photographs into engravings requires careful image processing to adjust contrast and brightness. Specialized software can aid in preparing images for laser engraving.
Rotary Engraving
Rotary attachments enable engraving on cylindrical objects like glasses and bottles. Proper calibration ensures the design wraps correctly around the object.
Troubleshooting Common Issues
Even experienced operators encounter challenges. Here are common problems and solutions:
Inconsistent Engraving Depth
This issue may result from an unfocused laser or uneven material surface. Re-check the focus and ensure the material lies flat.
Burn Marks on Material
Excessive power settings can cause burn marks. Reducing the laser’s power or increasing the engraving speed can mitigate this problem.
Laser Not Firing
This may be due to software issues or hardware malfunctions. Check the laser tube and power supply, and consult technical support if necessary.
For more troubleshooting tips, explore our guide on laser engrave cutting adjustments.
Maintenance and Longevity
Regular maintenance extends the lifespan of your laser engraver and ensures consistent performance.
Routine Cleaning
Dust and residue can accumulate on the laser components:
- Wipe Down Surfaces: Use a soft cloth to clean surfaces after each use.
- Clean Optics: Gently clean lenses and mirrors with appropriate solutions.
- Inspect Ventilation: Keep fans and filters free of debris.
Software Updates and Calibration
Stay updated with the latest software for improved functionality. Regular calibration maintains accuracy and precision in your engravings.
Cost Considerations
Investing in a laser engraving machine involves evaluating costs and potential returns, especially for business applications.
Initial Investment
Prices vary significantly based on the machine’s capabilities. Entry-level machines suitable for hobbyists may cost a few hundred dollars, while industrial-grade equipment can run into tens of thousands.
For a detailed breakdown, read our analysis on laser engrave cutting machine pricing.
Operating Costs
Consider expenses such as:
- Electricity Consumption: Varies by machine power and usage frequency.
- Maintenance Supplies: Cleaning solutions, replacement parts, etc.
- Material Costs: The price of substrates for engraving.
Return on Investment (ROI)
For businesses, calculate the ROI by considering:
- Product Pricing: How much you can charge for engraved items.
- Market Demand: The popularity of customized products in your area.
- Production Volume: How many items you can produce in a given time.
Understanding these factors can help determine if laser engrave cutting is a profitable venture for your business.
Building Your Own Laser Engraving Machine
For the technically inclined, constructing a DIY laser engraver can be a rewarding project that offers customization and cost savings.
Required Components
Key components include:
- Laser Module: Choose based on desired power output.
- Motion System: Rails, belts, and motors for X and Y-axis movement.
- Controller Board: Manages instructions and coordinates movement.
- Frame: A sturdy structure to hold all components.
Detailed instructions can be found in our step-by-step guide on laser engrave cutting machine construction.
Software Configuration
After assembly, configure software like GRBL or Marlin to operate your machine. Calibration is necessary to ensure accuracy and reliability.
Applications of Laser Engraving
Laser engraving serves various industries and creative endeavors.
Personalized Products
Engraving adds a personal touch to gifts, awards, and commemorative items. Customization increases the sentimental and monetary value of products.
Industrial Marking
Manufacturers use laser engraving for serial numbers, barcodes, and part identification, aiding in inventory management and quality control.
Art and Design
Artists leverage laser engravers to create intricate designs on various mediums, pushing the boundaries of traditional artwork.
Future Trends in Laser Engraving
Advancements in technology continue to expand the capabilities of laser engraving.
Integration with AI and Automation
Artificial intelligence can optimize engraving patterns and automate repetitive tasks, increasing efficiency and precision.
Enhanced Materials
New materials engineered for laser engraving allow for more durable and vivid engravings, expanding the application scope.
Conclusion
Mastering how to laser engrave involves a blend of technical knowledge, artistic design, and practical application. Whether you’re pursuing this skill for personal projects or professional services, understanding the intricacies of laser engrave cutting is essential. By selecting the right equipment, materials, and techniques, you can produce high-quality engravings that meet your creative or business objectives. Stay informed about technological advancements to remain at the forefront of this ever-evolving field.