how to engrave wood with laser
Introduction
Laser engraving on wood has revolutionized the way artisans and manufacturers create intricate designs and markings. The precision and versatility of laser technology have opened up new possibilities for customization and mass production alike. From personalized gifts to detailed architectural models, laser engraving offers a level of detail that is difficult to achieve with traditional methods. Understanding the techniques of laser engrave cutting is essential for anyone looking to harness this powerful tool.
The Basics of Laser Engraving Wood
Laser engraving is a subtractive manufacturing process that uses a focused beam of light to remove material from a surface to create a design. In the context of wood, the laser beam vaporizes the top layer, resulting in a precise and permanent engraving. The depth and darkness of the engraving can be controlled by adjusting the laser’s power and speed settings.
Understanding Laser Technology
There are various types of lasers used in engraving, with the most common being CO2 lasers. CO2 lasers operate at a wavelength that is highly effective for engraving wood and other organic materials. They offer a good balance between power and precision. Diode lasers and fiber lasers are also used, but they are generally more suitable for engraving metals and plastics.
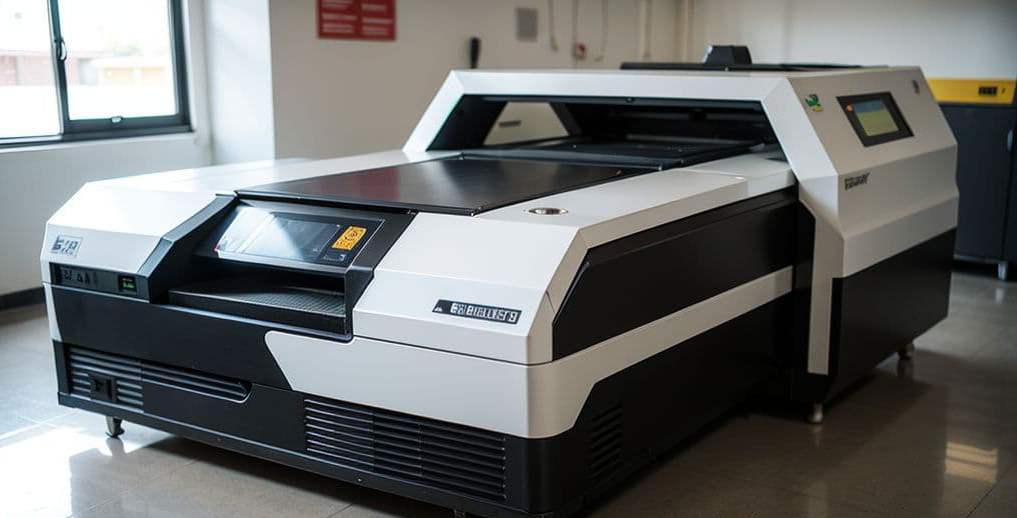
The laser engraver functions by directing the laser beam across the surface of the wood based on the design input from a computer. The beam’s intensity, duration, and movement are precisely controlled to achieve the desired effect. Modern laser engravers come with software that allows for complex designs to be easily uploaded and executed.
Choosing the Right Wood
Selecting the appropriate type of wood is crucial for achieving optimal engraving results. Different woods react differently to laser engraving due to variations in hardness, resin content, and grain patterns. Softwoods like pine and cedar tend to produce uneven engravings because of their resin content and inconsistent grain. Hardwoods such as maple, oak, and cherry provide a more uniform engraving surface.
Basswood and birch are also popular choices because they have minimal grain patterns and a light color that contrasts well with the darker engraved areas. It’s important to consider the moisture content of the wood as well; overly moist wood can lead to warping and poor engraving quality.
Setting Up the Laser Engraving Machine
Proper setup of the laser engraving machine is essential for safety and achieving high-quality results. Ensure that the machine is placed on a stable surface in a well-ventilated area. Laser engraving produces fumes and smoke, so adequate ventilation or fume extraction systems are necessary to maintain air quality and protect the machine’s optics.
Calibrating the laser focus is another critical step. The focal point of the laser must be precisely adjusted to match the surface of the wood. Most machines come with a focusing tool or guide to assist in this process. Correct focus ensures that the laser beam is concentrated for maximum efficiency and precision.
Designing for Laser Engraving
The design phase involves creating or selecting graphics that will be engraved onto the wood. Software such as Adobe Illustrator, CorelDRAW, or specialized laser engraving programs can be used to produce vector or raster images. Vector images are composed of paths and are ideal for precise lines and shapes, while raster images are pixel-based and suitable for photographs and detailed artwork.
When designing, it’s important to consider the contrast and detail level. High-contrast images with clear distinctions between light and dark areas translate better into engravings. Fine details may be lost if the resolution is too low or if the wood grain interferes with the engraving. Experimenting with different designs and testing on scrap wood can help refine the final output.
The Engraving Process
With the machine set up and the design ready, the actual engraving process can begin. This involves several steps to ensure the best possible outcome.
Preparing the Wood
Before engraving, the wood surface should be smooth and clean. Sanding the wood with fine-grit sandpaper removes any imperfections and provides a consistent surface for engraving. Wiping the wood with a damp cloth removes dust and debris that could interfere with the laser beam.
Some artisans apply masking tape or laser masking paper to the surface of the wood. This helps prevent smoke stains and makes post-engraving cleanup easier. The masking material is removed after engraving, revealing a clean design.
Adjusting Laser Settings
The laser’s power and speed settings are crucial variables that determine the engraving’s depth and appearance. Higher power settings increase the depth but may lead to charring or burning of the wood. Slower speeds allow the laser more time to interact with the wood, also increasing depth. Finding the right balance requires testing different settings on sample pieces of the same wood type.
Many laser engravers come with preset settings for common materials, but these should be used as starting points rather than absolutes. Factors such as wood density, moisture content, and desired engraving depth necessitate adjustments. Recording the settings that produce optimal results for different woods is a good practice for consistency.
Safety Considerations
Operating a laser engraver requires adherence to safety protocols to prevent injuries and equipment damage. Lasers used for engraving are powerful enough to cause serious harm to eyes and skin. Wearing appropriate safety glasses designed for the laser’s wavelength is mandatory. These glasses protect against accidental exposure to scattered or reflected laser beams.
Additionally, the fumes generated from burning wood contain volatile organic compounds (VOCs) that can be harmful if inhaled. Proper ventilation or an air filtration system is essential to maintain air quality. Some woods, like cedar or treated lumber, may produce particularly noxious fumes and should be avoided or handled with extra caution.
Post-Engraving Techniques
After engraving, there are several steps that can enhance the appearance and longevity of the wood piece. Removing any residual masking material and gently cleaning the surface with a soft brush or cloth eliminates soot and debris. For a darker engraving, applying a finish such as mineral oil or wax can deepen the contrast.
Applying a clear coat or sealant protects the wood from moisture and wear. If the engraved piece will be handled frequently or exposed to the elements, this is especially important. Staining or painting the wood before engraving can also create interesting contrasts and effects, as the laser removes the top layer to reveal the natural wood beneath.
Advanced Techniques and Tips
For users looking to elevate their laser engraving projects, several advanced techniques can add depth and complexity to your work. One such technique is creating 3D effects by varying the laser’s power across different areas of the design. This process requires careful planning and experimentation but can produce stunning relief engravings.
Incorporating inlays is another method to enhance engraved pieces. After engraving a cavity into the wood, it can be filled with resin, colored epoxy, or other materials to create a contrasting inlay. This adds color and texture, making the design stand out even more.
Utilizing techniques like dithering can improve the quality of photographic engravings. Dithering adjusts the image to simulate shades of gray using patterns of black and white, which translates well onto the wood surface. Understanding how to manipulate these settings in your software can significantly affect the final outcome.
Maintenance of Laser Engraving Equipment
Regular maintenance of the laser engraver ensures longevity and consistent performance. Cleaning the laser lens and mirrors prevents residue buildup that can diminish the laser’s effectiveness. Using cotton swabs and approved cleaning solutions, these optical components should be cleaned according to the manufacturer’s recommendations.
The motion systems, including rails and belts, should be inspected and lubricated if necessary. Dust and debris from engraving can accumulate in moving parts, leading to errors or mechanical wear. Keeping the workspace clean and performing routine checks can prevent costly repairs and downtime.
Common Challenges and Solutions
Despite careful preparation, several challenges may arise during laser engraving. Uneven engraving depth can result from inconsistent wood grain or improper focus. Ensuring the wood is of high quality and the laser is properly focused can mitigate this issue.
Smoke stains around the engraved areas are another common problem. Using masking tape or increasing the air assist settings on the laser engraver can reduce smoke accumulation. Air assist directs a stream of air at the engraving point, removing smoke and debris from the laser path.
If the engraving appears too light or lacks contrast, adjusting the laser power or making multiple passes may improve the outcome. Again, testing on scrap pieces is invaluable for troubleshooting and achieving the desired result.
Applications of Laser Engraving on Wood
The applications of laser engraving on wood are vast and varied. In the commercial sector, it is used for branding products, creating signage, and producing decorative items. Personalized gifts such as engraved cutting boards, picture frames, and jewelry boxes are popular in the consumer market.
In architecture and engineering, laser engraving assists in creating detailed scale models and prototypes. Educational institutions utilize laser engravers for projects in art, design, and engineering courses. The technology also plays a role in the production of musical instruments, furniture embellishments, and even in the creation of intricate marquetry.
Environmental Considerations
While laser engraving is a precise and efficient method, it’s important to consider the environmental impact. The process consumes electricity and generates fumes. Selecting sustainably sourced wood and implementing proper waste disposal practices can reduce the environmental footprint.
Additionally, investing in energy-efficient machines and keeping equipment maintained contributes to reduced energy consumption. Using ventilation systems with filters helps minimize harmful emissions into the atmosphere.
Future Trends in Laser Engraving
Advancements in laser technology continue to expand the capabilities of engraving machines. Developments in higher-powered yet more compact lasers are making professional-grade equipment more accessible. Integration with 3D scanning and printing technologies opens up new possibilities for complex design work.
Software improvements are also streamlining the design-to-production workflow. More user-friendly interfaces and cloud-based platforms allow for collaborative work and remote operation. The growing trend of customization and personalization in consumer goods suggests a bright future for laser engraving applications.
Expert Insights and Recommendations
Professionals in the field emphasize the importance of continuous learning and experimentation. Keeping abreast of new techniques, materials, and technologies enhances one’s ability to produce high-quality work. Joining communities and forums dedicated to laser engraving can provide valuable support and resources.
It’s also recommended to maintain a portfolio of work, documenting settings and outcomes for various projects. This serves both as a reference for future work and as a showcase of capabilities for potential clients.
Conclusion
Mastering the art of laser engraving wood combines technical knowledge with creative experimentation. By understanding the properties of different woods, fine-tuning laser settings, and employing effective post-engraving techniques, it’s possible to produce stunning and precise engravings. Whether you’re a hobbyist or a professional, laser engraving offers a versatile and rewarding way to bring designs to life on wood.
As you embark on your journey into the world of laser engrave cutting, remember that patience and practice are key. Each project offers an opportunity to learn and refine your skills, contributing to both personal satisfaction and professional growth.